OneNote - Fix synchronization problems in the Windows 10 App
If you had already set up a Microsoft account in self service and created OneNote notebooks there before the global introduction of Microsoft 365 at UZH, the Windows 10 OneNote app may no longer be able to synchronize.
The following steps show you how to reactivate the synchronization of your notebooks.
After having reactivated data synchronization, you'll have to move your data to your new UZH account or into a private Microsoft account (if you're talking private data). The former UZH accounts ("*@*.onmicrosoft.com", e.g. peter.muster@uzhch0.onmicrosoft.com) are going to be inactivated shortly.
This guide covers the simplified OneNote app that comes with Windows 10 (OneNote entry on the Start menu), not the more powerful OneNote 2016 application that comes with Microsoft or Microsoft 365 (OneNote 2016 entry on the Start menu).
What is the issue?
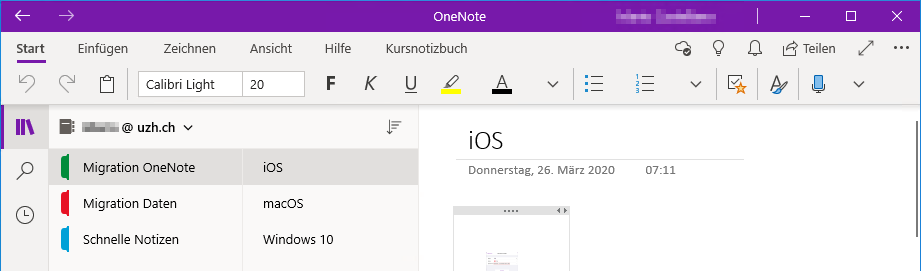
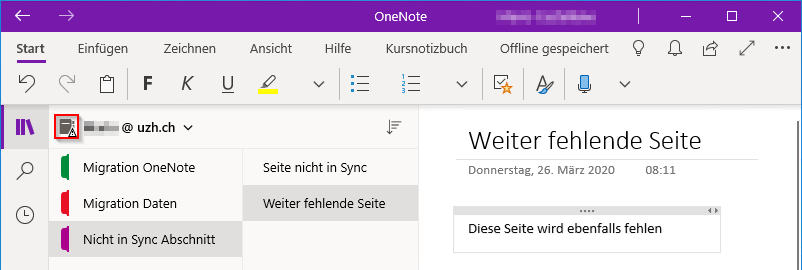
In OneNote, an exclamation mark is displayed on your notebook's icon. You can still work with the notebook, but the changes are no longer synchronized to the network and other devices.
The cause of the problem is that with the UZH-wide rollout of Microsoft 365 accounts that were previously created in self service have been renamed. In some cases, the OneNote app has not realized this and therefore cannot log in to your Microsoft account. You received an email around 12 March 2020 informing you of the new name of the old account. It has the form "*@*.onmicrosoft.com" (example: peter.muster@uzhch0.onmicrosoft.com).
Procedure for reactivating synchronization
Table of contents
Create backup copy of local data
We recommend having a current backup of your OneNote data at hand to prevent data loss. Please note that restoring this data is only successful, if the OneNote App has not been updated in the mean time. To prevent data loss even in this case you need a backup of your complete system. You'll find details on how to do this on Microsofts website.
- Close the OneNote app if it is open.
- Copy the following folder to another location:
%LocalAppData%\Packages\Microsoft.Office.OneNote_8wekyb3d8bbwe
If you need to restore the data folder, please follow the steps on the page OneNote - Notebook Migration - Troubleshooting
Log out of your Microsoft account and login again
Caution: To prevent data loss, please note:
- Make sure you do have a data backup before signing off from the OneNote App!
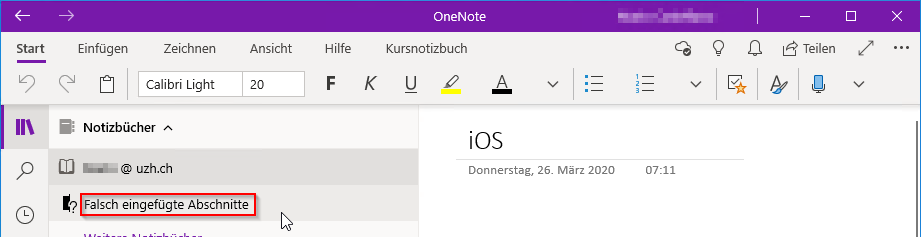
- On signing off, all unsynchronized sections are moved to "Misplaced Sections". If you sign in again and sign off once more, these "Misplaced Sections" are deleted irrevocably! To prevent data loss, please move all "Misplaced Sections" to a new or temporary notebook before you sign off a second time!
- If necessary, open the OneNote app
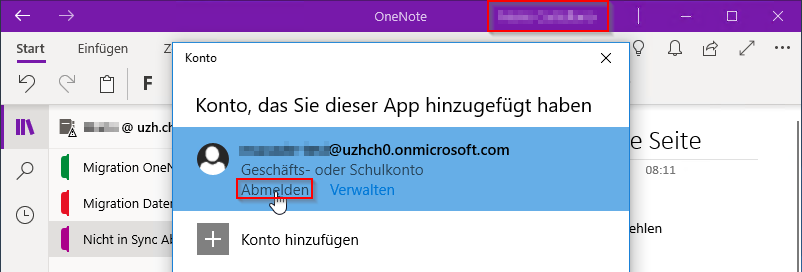
- Click on your name in the title bar of the OneNote app and click on the "Logout" link in your account. Possibly, the old account name is still displayed here (...@....uzh.ch) instead of the one that has been valid since the renaming (...@....onmicrosoft.com).
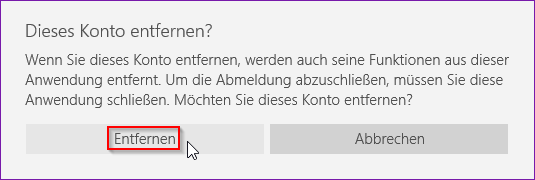
- Confirm the removal of the account.
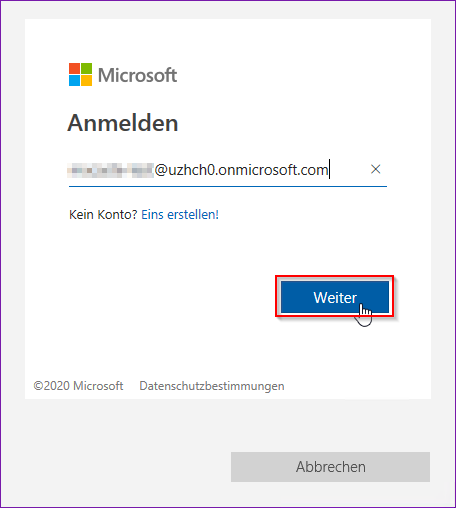
- Sign in again. To do so, use the login name that was sent to you by e-mail around 12 March 2020 when the accounts were renamed.
Insert missing sections in online notebook
With the new registration the synchronization works again. However, data entered during the synchronization interruption is missing and is only available locally. Copy them into the online version of the notebook according to the following procedure.
- Newly created sections are missing, changes have not been adopted.
- Select "Misplaced Sections" in the notebook list.
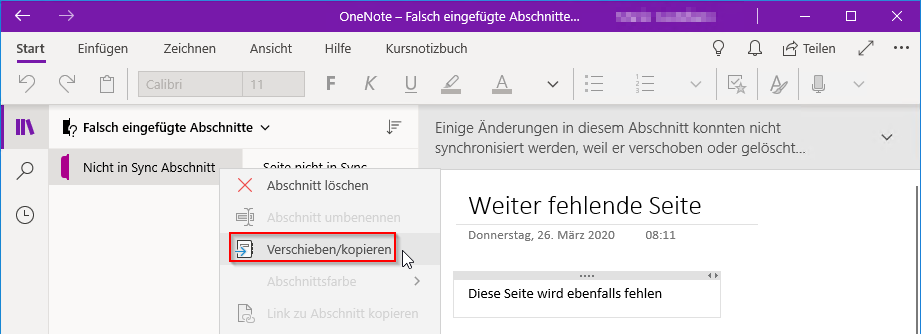
- The sections that could not be synchronized are stored here. Modified sections are saved here in full. These contents can now be moved or copied. To do this, right-click on a section below "Misplaced Sections" and select "Move/Copy" from the context menu.
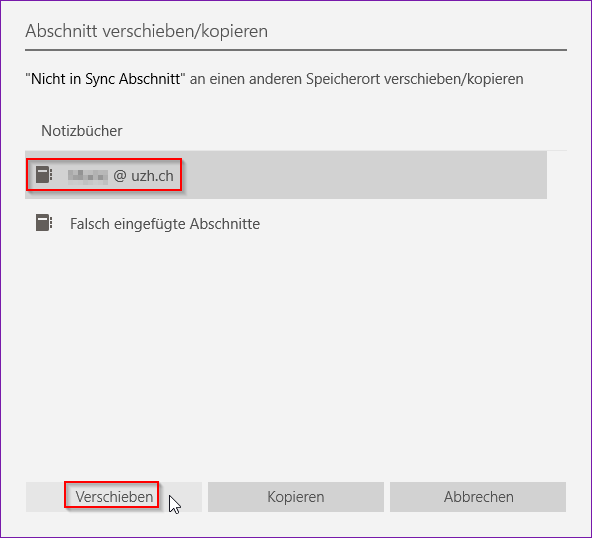
Note: If an existing section has been changed, the entire section including modifications is available under "Misplaced Sections". If this section exists in a previous version of the online notebook, it will be overwritten when moving/copying. It may therefore be worthwhile to rename the section at the destination before - Finally, select the notebook to which the section is to be copied and click "Move" (or optionally "Copy").